Software developers, brace yourself. You're about to welcome an AI buddy into your coding life.
Outlandish? Perhaps. But that's the reality of what Microsoft Copilot brings to the table. It's coding assistance that's not just smart, but also dynamic, almost like it's got a mind of its own.
Picture this. It’s late night and you're deep into a coding session. The framework is complex, the logic is tricky, your coffee cup is empty. A familiar snag grips you. Now imagine with every line you type, there’s an invisible co-pilot nudging you with suggestions or improvements. Saving your time, increasing your productivity.
Well, that's not some sci-fi coder’s dream. It's the real deal. It's Microsoft Copilot. This AI plugin integrates with your Visual Studio Code and chips in with its golden inputs as and when you need it. It's smart software amplifying your smart work.
In this guide, we'll be shedding the fluorescent light on how one goes about getting, setting up, and using this game-changer. Buckle up, and enjoy the journey of making coding smarter, smoother, and simplifying it in ways, you perhaps, never thought of before.
Steps to Get Microsoft Copilot
Perfect, you're ready to get Microsoft Copilot. But, it's not a one-click process. We have a few steps to tick off first to make sure it works like a charm.
It's really pretty simple: First, we'll create a GitHub account (if you don't have one already), then we'll set up Visual Studio Code, install the GitHub Copilot extension within it, and finally, we'll understand how to use Microsoft Copilot.
Let's break it down. By the end, you'll navigate these steps like a pro. Ready? Let's get started!
Getting Started
So you want to get Microsoft Copilot running, right? Perfect. Before we kick off, let's look at a few necessities.
First, you need a computer. Microsoft Copilot runs in Visual Studio Code, a tool to write and edit code. You can use any computer that can run Visual Studio Code. That means it can be a Windows PC, a Mac, or a Linux machine.
Next up is your internet connection. It should be reliable. Microsoft Copilot leans on the cloud a lot, meaning it needs the internet to work. It's like a conversation: to get answers, you gotta ask questions.
Then we have a GitHub account. Microsoft Copilot is connected to GitHub. If you don't have a GitHub account, don't fret—we will go through setting one up step-by-step.
Lastly, you need Visual Studio Code. This will be our playing field. It's where you'll code and it's where Microsoft Copilot will help you out. It's a free tool, so no need to worry about costs.
That's it: a computer, a good internet connection, a GitHub account, and Visual Studio Code. Once you've ticked these off the list, you're good to go. Let's look forward to becoming coding buddies with Microsoft Copilot!
Creating a GitHub Account
Alright, getting a GitHub account is your next step. It's easy and won't take much time. Let's go through it together.
First, head to the GitHub website. You can simply type "GitHub" in your browser and click on the first link that pops up. Once you're there, you'll see a "Sign Up" button, usually at the top right corner. Hit that button.
Now, you'll see a form asking for some basic stuff. You need a username. Pick something unique that speaks to you. Then, you'll have to enter your email. Use an email you check often because GitHub will send you important stuff there.
Next is the password. Create a strong one. A mix of letters, numbers, and symbols is a good idea. Keep it something you'll remember but hard for others to guess.
After you enter all that, GitHub will ask you to verify you're not a robot. It's usually a puzzle or checkbox. Simple.
Then, you'll see a page asking about plans. The great news is, the free one works just fine for us. You don't need to pay anything. Select the free plan.
Lastly, GitHub will send a verification email to the address you provided. Open your email, find the message from GitHub, and click on the link inside to complete your signup.
And that's it! You now have a GitHub account. Told you it was straightforward. Having a GitHub account is crucial for using Microsoft Copilot, and now that box is checked off. Let's dive into the next steps.
Suggested reading: How to Use Copilot in Microsoft Teams: A Step-by-Step Guide
Setting Up Visual Studio Code
Great, you've got a GitHub account now. The next piece of the puzzle is Visual Studio Code, often just called VS Code. Let's set that up.

Starting off, visit the VS Code website. It's easy to find; just search for "VS Code" online, and it's usually the first result. When you hit the page, you'll see a big blue button saying "Download". It knows your computer type, so just click the one that's right for you.
Once the download is done, open the file you just got. Your computer will walk you through the install. Just keep clicking "Next" and agree to the license terms. There's no trick here; it's all straightforward.
After it’s installed, open VS Code. It's a pretty neat space, but you might see it's a bit bare to begin with. We're going to add some power to it with an extension for GitHub Copilot.
Extensions are like upgrades. You add them to VS Code to give it more muscle. To add the Copilot extension, click on the square icon on the left side. It's called "Extensions". In there, simply type "GitHub Copilot" in the search bar. It’s usually the top result. Click "Install" on it.
Just a heads-up, the first time you try to use GitHub Copilot in VS Code, it will ask you to sign in with that GitHub account you just made. Go ahead and do that. It links your new tool with the muscles we just added.
And with that, you’re set. VS Code is up and running. It’s ready to be your new coding sidekick. Up next, we'll go into how to actually get Microsoft Copilot working inside this new setup.
Installing GitHub Copilot in Visual Studio Code
Now, it's time for the real action. We're going to install GitHub Copilot in your newly set-up Visual Studio Code. This is where all those earlier steps pay off.
First, you've got to fire up VS Code. When it's open, check out the panel on the side. There's a bunch of icons there. One looks like four little squares — the Extensions button. That's where we're headed. Click it.
Up at the top, you'll see a bar for searching. You're going to type "GitHub Copilot" in there. Once you hit enter, the extension you're after will pop up. It’s usually the first one on the list. Once you see it, select it. Noteworthy, the icon looks like a small green and white airplane.
Then, look over to its right. You'll see a button that says “Install”. Go ahead, click it. VS Code will do its thing, and in next to no time, you'll see the "Install" button switch to "Uninstall". That's your green light. It's installed.
Now that you’ve installed GitHub Copilot, it’s going to need permission to do its job. You’ll see a new button labeled "Sign in to sync settings." Click that, and then choose "Sign in with GitHub." Here, you'll need your GitHub account details.
It will take you back to VS Code once that’s done. You might not notice any big change, but you've just hustled Copilot into the passenger seat of your coding journey.
Take a minute to pat yourself on the back. You’ve done a pretty good job so far. Up next, we’re going to learn how to actually use Microsoft Copilot. But for now, know that you've just made a solid leap towards coding smarter. Buckle up for the fun!
Understanding How to Use Microsoft Copilot
Now that we've got Microsoft Copilot set up, it's time to understand how to use it.
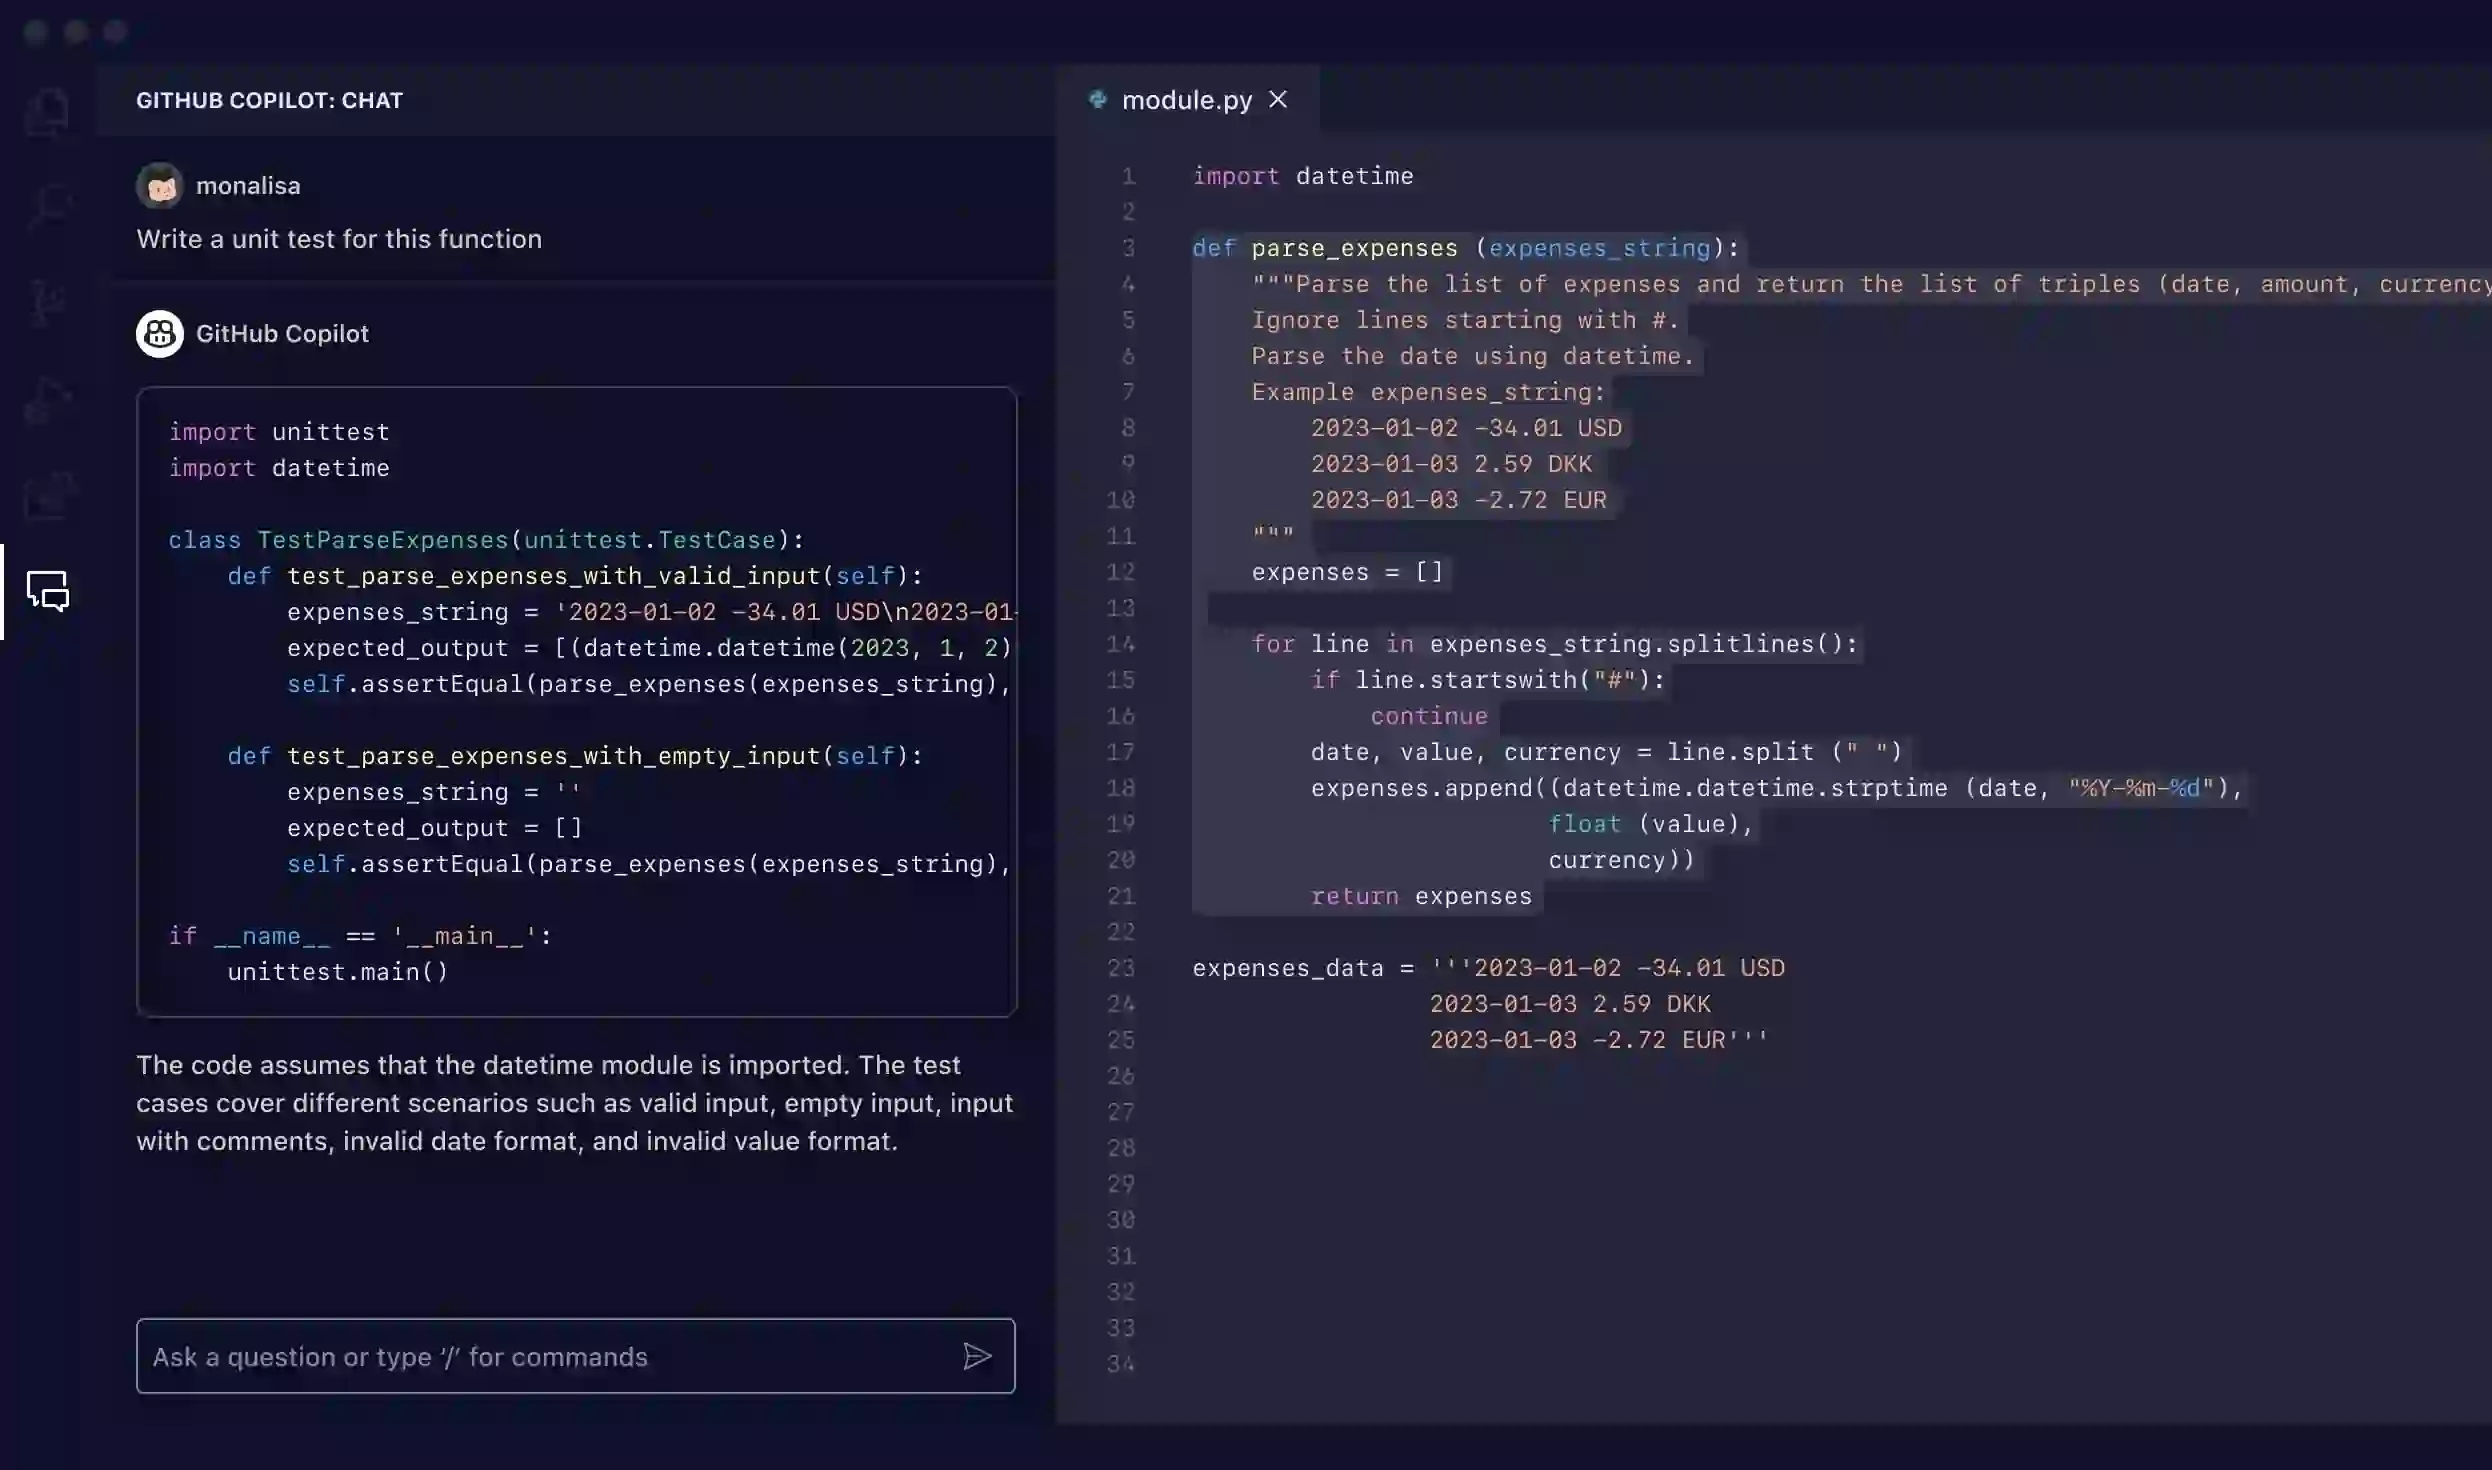
Microsoft Copilot is an AI buddy. As you start typing code, it jumps in and offers to finish your line or block of code. It's like it’s guessing what you're about to say, but in a very smart and trained way.
You code in the editor as usual. But now, GitHub Copilot will automatically suggest completions for your code as you're typing. These suggestions appear inside the editor in a light color. When Copilot's suggestions look right, simply hit the "Tab" key to accept them.
Remember, it's a buddy, not a boss. GitHub Copilot makes suggestions, but only you decide if to use them or not. It’s like a team where you're the captain. So, you decide which suggestions to take and which ones to skip.
Give it a shot. Start typing some code and watch Copilot jump in to assist. The more you use it, the better you’ll get at working together. Enjoy the edge it gives you as you code!
Conclusion
And that's a wrap! You navigated through getting a GitHub account, setting up VS Code, and adding the GitHub Copilot extension. Now, you're all set with a powerful tool to boost your coding.
Remember, Copilot is there to help, not to take over. You're in the driver's seat. Use its suggestions wisely, and always keep your own judgment in play.
Finally, give yourself a pat on the back. You've leveled up your coding setup. Dive in, start coding, and see how Microsoft Copilot makes a difference. Happy coding!
Suggested reading: Which AI Assistant is Better Copilot or Google?
Frequently Asked Questions (FAQs)
Does Microsoft Copilot support coding languages other than Python?
Absolutely. It supports several languages and frameworks like JavaScript, TypeScript, Ruby, Java, and many more.
Is GitHub Copilot free to use?
Yes, it's free. It's an extension that you can add to your Visual Studio Code setup without any cost.
Can Microsoft Copilot work offline too?
Nope. GitHub Copilot requires an active internet connection to show you code completions.
That's how it accesses its knowledge base.
Does using Microsoft Copilot mean my coding skills will get rusty?
Not if you use it wisely. Copilot is meant to assist, not to replace your coding.
It's always your decision to accept or reject its suggestions.
